Freezing One Dish Dinners – Tips and Tricks

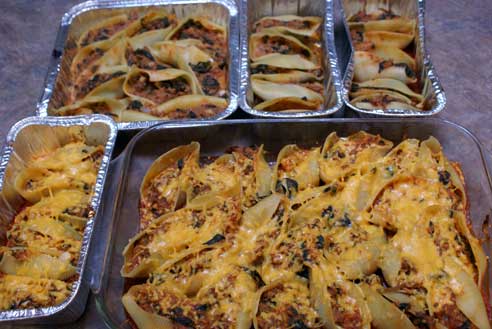
(Recipe: Italian Stuffed Shells on $5 Dinners)

I’m a big believer in taking advantage of the time that you spend in the kitchen.  I batch cook. And batch bake.

A lot.

While I prefer fresh food, hot out of the oven…I often find myself doubling up meals to put in the freezer. To either use for our family on a busy weeknight, or a weekend evening when I don’t feel up to cooking.  Or for a friend or family member in need of a warm home cooked meal.

Soon I’ll be sharing what does and doesn’t freeze well.  But first, I wanted to remind you of a few things you want to remember when it comes to freezing your one dish dinner meals.

1. Cool completely – You can dramatically reduce the amount of freezer burn of your food if you cool it completely before packaging it for the freezer.

2. Double wrap – When you go to package up your meal for the freezer, I suggest using the double wrap approach. Covering a small disposable baking dish with foil, then placing it into a plastic freezer bag.  Wrapping in plastic wrap, then foil.  It’s my preferred method and I think it keeps the food better in the freezer.

3. Disposable pan, or line with foil – To save on dishes and to save some elbow grease, do your batch cooking casseroles in disposable pans, or line your glass baking dishes with foil before baking.  Then after the casserole has been cooked and cooled, you can place the baking dish in the freezer.  Once the food is frozen, remove the baking dish from the foil wrapped food.  Then when it’s time to thaw and reheat, place the frozen food back in the same baking dish, let thaw…then cook.

4. Label first – If you try to freeze your food, then go back and label it, chances are it won’t stick to well.  Tape won’t stick to the pans or foil, and a permanent marker won’t write well on “wet” frozen plastic baggies or foil. (Ask me how I know.)

5. Thaw in fridge, then reheat. For best results, completely thaw your meal in the refrigerator before reheating it. If you have to reheat it straight from the freezer, I would add at least an additional hour on to the baking time indicated by the recipe.

 What freezing, thawing and reheating tips can you share with us!?

Posted in How To, Tips and Tricks | 7 Comments

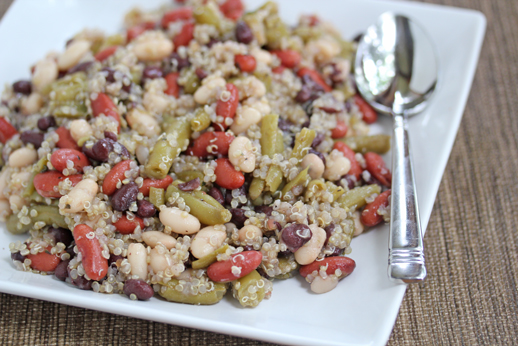
Four Bean Salad with Quinoa Recipe

Light. Easy. Summer. Salad.

The quinoa cooks on the stovetop in just a few minutes.  If you really don’t want to have any heat in your kitchen, cook the quinoa in a rice cooker out on your patio. Once the quinoa is cooked, the rest is “dump and stir.”

A refreshing light salad…perfect for the dog days of summer!

Print This Post

Four Bean Salad with Quinoa

Yield – 4-6 servings
Prep Time – 5 minutes
Cook Time – 20 minutes

Ingredients

1 cup quinoa
1 can green beans, drained and rinsed
1 can black beans, drained and rinsed
1 can red beans, drained and rinsed
1 can white beans, drained and rinsed

Dressing

1/4 cup olive oil
1/4 cup red wine vinegar
1 tsp Italian seasoning
1/2 tsp Kosher salt and pepper, each


Directions

  • Cook the quinoa according to package instructions.
  • Once the quinoa has cooked, add the green beans, red beans, black beans, and white beans.
  • Mix in the olive oil, red wine vinegar, Italian seasoning and salt and pepper.  Mix well.
  • Chill at least 2 hours in the refrigerator.
  • Serve for a light dinner, lunch or nibble on for a protein packed snack.
Posted in Dutch Oven, Recipe | 7 Comments

Cooking Pasta in a Skillet Dinner – One Dish Dinners Tips and Tricks

When it comes to one dish dinners, some of my favorites to make are skillet dinners. A 12″ deep skillet makes just the right amount for our family…even leaving leftovers at times.

To get a full meal into the skillet, it requires some meat or chicken, some veggies and some pasta or rice. I usually end up doing pasta because I have so much in my stockpile, and because I prefer to use brown rice when cooking and that just takes to long, especially when I’m in need of a quick skillet dinner!

Most skillet dinners look like this…brown the beef or chicken…add some veggies and pasta, and then add the liquid and the pasta noodles.  Different skillet dinner recipes vary widely on how much pasta to include and then how much liquid is needed.

There are several factors that go into determining how much liquid is needed with the amount of pasta used.  Including type of pasta, how much liquid is already in the skillet from veggies sweating, how much liquid has already cooked off, and the size of the skillet or saucepan that’s being used.

Here’s how I measure it for quick cooking pastas, regular pastas and whole wheat pastas.

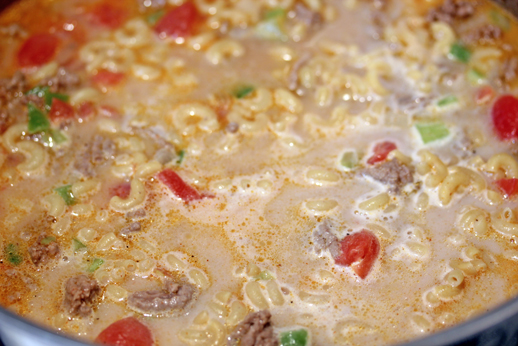
  • Start with 2 cups of liquid for every 12 oz. of pasta.
  • Then you will have to eyeball it…but you want it to look like what’s in the picture above.  Enough liquid to cover most of the noodles.


Then cook for 8-10 minutes, covered tightly.  The noodles will soak up the liquid. I also recommend gently stirring the contents of the skillet once or twice…but do so quickly, as you don’t want too much steam and vapor to escape.

If you add too much liquid by accident, remove the lid of the pan and let the water cook off.  And if you don’t add enough, just add some smoking hot water from the tap, about 1/4 cup at a time.

I hope this helps you better understand the method of making skillet dinners…and I hope my measuring tips will make your next pasta skillet dinner perfect!

Posted in How To, Skillet Dinner, Tips and Tricks | 9 Comments

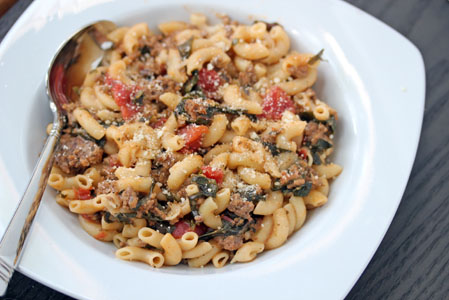
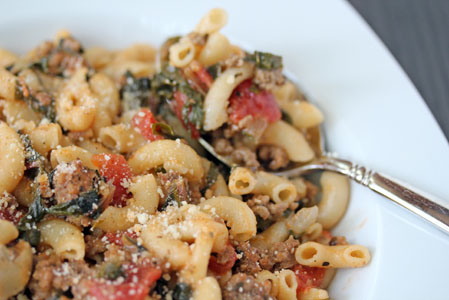
Skillet Macaroni with Swiss Chard Recipe

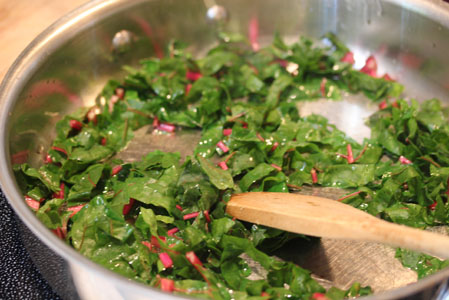
Swiss chard is one of those intimidating vegetables. Until you figure out that it cooks just like spinach…and works just like spinach in just about any recipe!

Spinach, whether fresh or frozen, is one of those ingredients that I use often in “red sauce” meals with pasta.

And this Swiss chard recipe will soon become Exhibit D. Or exhibit A of the “swiss chard and red sauce” files.

(whatever.)

This chard is straight from the garden. Thanks to all the rain and cool weather this spring, the chard really grew strong and well!

I’m so glad to have had so much to cook with this year, and I’ll be making the again soon with chard from the farmer’s market (after mine runs out!).

*Note: this recipe does call for leftover spaghetti sauce…about 1/3 lb. ground meat plus . If you don’t have any on hand, I highly recommend making up a big batch…then use some for this recipe and freeze the rest.  Then you’ve got some ready when you need a night “off” from cooking.

Enjoy…

Print This Post

Skillet Macaroni with Swiss Chard

Yield – 4 servings
Prep Time – 10 minutes, if sauce is already made
Cook Time – 20 minutes

Ingredients

1 Tbsp olive oil
10-12 Swiss chard leaves, chopped
about 2 cups leftover spaghetti sauce
1 tsp Italian seasonings, if the sauce is mildly flavored
12 oz. elbow macaroni noodles
2 cups water, or beef broth
1/2 cup Parmesan cheese


Directions

  • Add the olive oil to a 12 inch deep dish skillet and saute the chopped Swiss chard leaves for 2-3 minutes, or until bright green and soft.
  • Stir in the leftover spaghetti sauce and some Italian seasonings, if necessary.
  • Stir in 2 cups of hot water, along with the pasta noodles.  Gently combine so the pasta noodles are under the liquid.  Add more liquid, 1/4 cup at a time, until all the pasta is under the liquid.
  • Bring to bubbling, then cover tightly and cook over medium heat for 8- 10 minutes, stirring once.
  • Once the pasta is al dente, remove the skillet from the heat and uncover. Let sit for a few minutes and let the sauce thicken if necessary.
  • Toss in the Parmesan cheese and stir into the skillet pasta dinner.
  • Serve Skillet Macaroni with Swiss Chard.
Posted in Recipe, Skillet Dinner | 4 Comments

Quick and Easy Sides – One Dish Dinners Tips and Tricks

When it comes to making one dish dinners, it is my goal that the entire meal gets cooked in the same pot, slow cooker, skillet, Dutch oven or all on the grill. But I am not an extremist, nor am I a purist when it comes to one dish dinners.  I do my best to meet my goal when coming up with one dish dinner recipes, but I don’t stress out if I need to serve it with a slice of bread and butter, or with a slice of watermelon or cantaloupe.

The whole purpose of one dish dinners is to keep the dishes to a minimum, keep the preparation time to a minimum and to use simply cooking methods.  In testing and working with new recipes, I generally just use the dish that the meal is being cooked in, along with either a cutting board or a mixing bowl.  Not more than that!

Every now and again, I’ll make up a dish and it just would go so perfectly with a side. Like a Black Bean Chili…that really would be perfect if served over a day old slice of bread in the bottom of the bowl.

So here are a couple of quick and easy side dishes that could be paired with a one dish dinner. They aren’t going to take much extra cooking time, or cutting time. (Nothing you couldn’t do while the one dish is in the oven or simmering on the stovetop.)

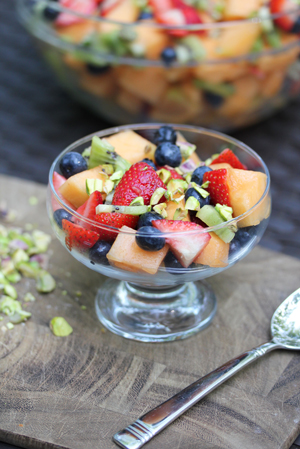
  • Sliced fruit – there’s nothing better than a cool refreshing slice of cantaloupe to go with a warm, spicy chili.
  • Fresh fruit salad- If you’ve got some in the fridge, serve it up with a spicy one dish macaroni.
  • Dinner rolls, homemade or from the store freezer – perfect with a one dish lasagna.
  • Day old French bread- delicious when snuck into the bottom of a bowl of chili.

There you have it…sneaky, no mess ways to round out a one dish dinner meal!

What do you say?! Are you a one dish dinner purist?! Am I being too lenient?!


Posted in How To, Tips and Tricks | 2 Comments