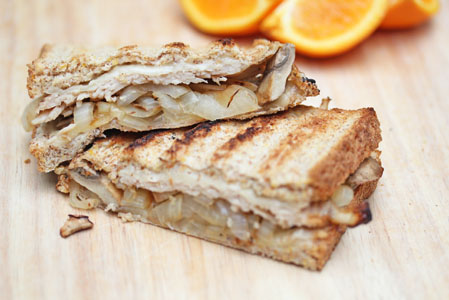
Turkey, Mushroom, Onion & Swiss Grilled Panini Recipe

Panini. Yes, please.

Panini on the grill. Yes, yes, yes please.

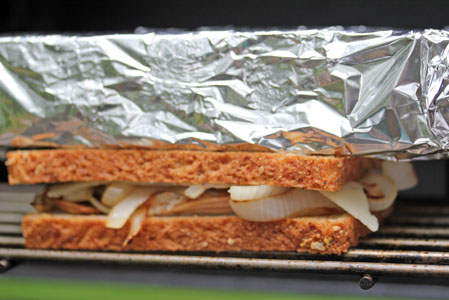
I don’t have a panini maker. While I’ve thought a time or two about how it would be nice to have one, I’ve never been able to justify buying one for “every now and then”…and when I’ve got a perfectly functioning grill and a brick covered with foil.

Huh?!

Yes…you read that right! You can use a brick covered with foil…or some other heavy contraption that will press the sandwich together on the grill as it cooks and heats through.

So how is it that I’m calling this a “one-dish” dinner?!? If you count the grill as one dish…or the grill basket as the one dish, then it works! Paired with some fresh fruit and you’ve got a perfect one dish dinner to enjoy during these warm summer nights.  The only other dish you’ll need is a cutting board and that won’t even get really messy!

The goal (or my goal at least) for one dish dinners is cooked using one dish/grill, easy cleanup, and easy prep. This recipe fits the bill!

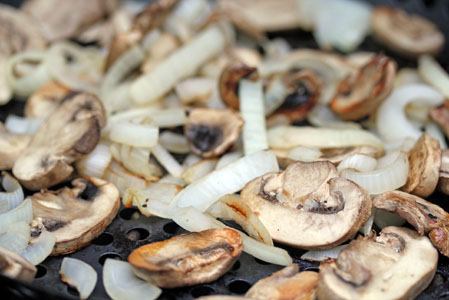
Saute the mushrooms and sliced onions in a grill basket or skillet.

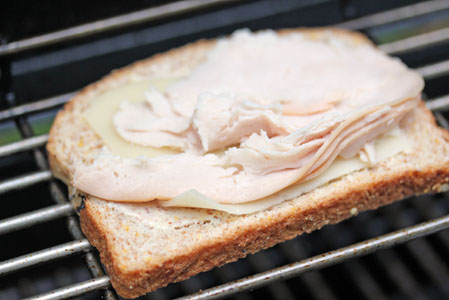
Once the mushrooms and onions are done, prepare the sandwich…spread dijon or spicy mustard onto both slices. Place 1 slice plus 1/2 slice Swiss cheese and turkey delimeat on the bread.

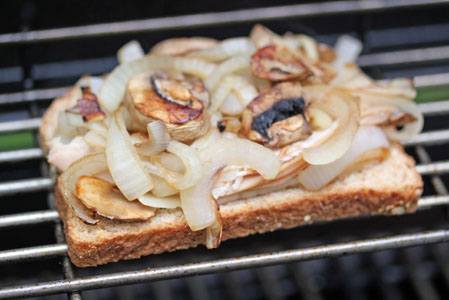
Top with the warm grilled onions and mushrooms, then the other 1/2 slice of Swiss and the other bread piece.

Place brick or other heavy object on top to smoosh the panini together. Grill for 3-5 minutes per side, depending on how hot your grill is…watch the underneaths of the edges of the bread as best you can so that it doesn’t burn.

Slice and serve with fresh fruit.

The perfect summertime sandwich!

Print This Post

Turkey, Mushroom, Onion & Swiss Grilled Panini

Yield – 4 servings
Prep Time – 10 minutes
Cook Time – 20 minutes

Ingredients

1 white onion, sliced
8 oz sliced mushrooms
8 slices whole grain bread
About 1 Tbsp Dijon or spicy mustard
6 ounces turkey delimeat
4 slices Swiss cheese
4 oranges, sliced, or other fresh fruit


Directions

  • Grill the sliced onions and sliced mushrooms in a grill basket or skillet, 5-10 minutes, or until begin to brown.  Toss a few times. (If you don’t have one, saute them in a skillet for a few minutes)
  • Spread the mustard on the bread and once the onions and mushrooms are done, begin to assemble the panini.
  • Bread – 1/2 slice Swiss – turkey meat – onions/mushrooms – 1/2 slice Swiss – bread
  • Place on the grill and press down with brick or other heavy object. Place over indirect heat and grill for 4-5 minutes per side.
  • Serve Turkey, Mushroom, Onion and Swiss Panini with fresh fruit.
Posted in Grill, Recipe | 6 Comments

The Importance of Meal Planning and Cooking Plans – One Dish Dinners Tips and Tricks

When it comes time every Sunday to put together a meal plan and kitchen strategy for the week, I’m always looking to combine meals and tasks to get the most bang for my buck…and my tick-tock. Making One Dish Dinners is certainly an easy way to make the most of your time in the kitchen.

As I test recipes for my One Dish Dinners cookbook and as I fiddle with ingredients and one dish cooking methods, I have found that the time that it takes to assemble the recipes and get them going in the slow cooker or baking in the oven or sauteing in the skillet is often less than 10 minutes…sometimes even less than 5 minutes!

One of the reasons that it takes me so little time to assemble some of these recipes is because I already have some of the leg work done ahead of time…chopping onions, batch grilling chicken, doubling or tripling a red or white sauce…then it just becomes a matter of dump and cook!

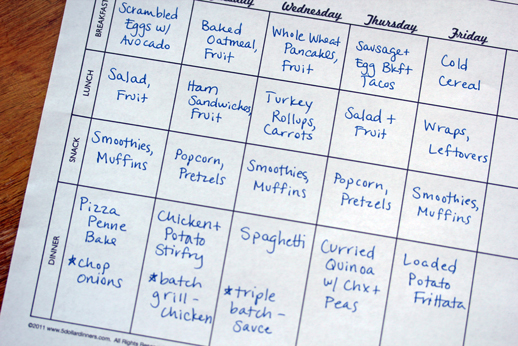
Let’s take a look at the meal plan above and you’ll get a sense for what I’m talking about. On Monday night, I’ll chop up some onions while the Pizza Penne Bake is cooking (and I might even throw some into that meal too.)  Then I’ve got them for later in the week for breakfast tacos, Curried Quinoa with Chicken and Peas, and whatever I don’t use I can toss in the freezer to use in a soup or stirfry later in the month.

On Tuesday night, I’m going to batch grill a few extra packages of chicken breasts with the Chicken and Potato Stirfry is on the grill.  Then I can use the grilled chicken for the Curried Quinoa recipe, or tossed onto a salad at lunch.  And just like the onions, whatever is not used can be frozen for later use.

And on Wednesday night when I’m making my favorite spaghetti sauce, I might as well triple the batch of sauce so I don’t have to make that on another night when I need a quick “no brainer” meal!  Are you starting to see the method to my madness?!

Being able to spend less time in the kitchen will allow you to spend more time with your family doing the things you love to do!

The meal planner pictured above, and other printable planners, are available for free on the $5 Dinners Printable Planners page.

What are some ways that you stretch your bucks and your minutes in the kitchen?!

Posted in How To, Tips and Tricks | 7 Comments

Chicken and Potato “Stirfry” on the Grill Recipe

Can you really do an entire meal on the grill?!

Why yes. Yes you can.

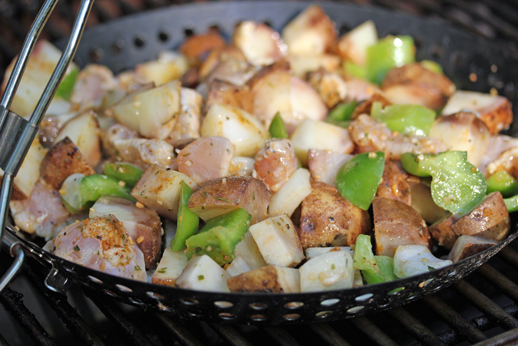
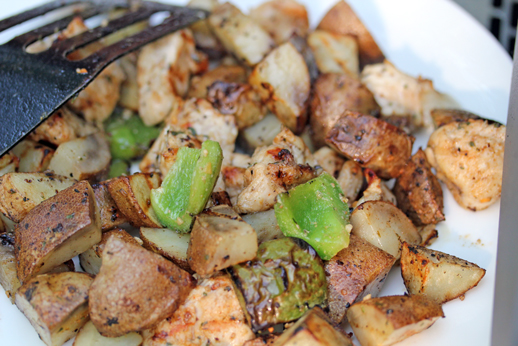
This is the perfect one dish dinner…all cooked together on the grill.  And served with a few watermelon wedges that are sweet, juicy and drip all down your chin!

Summertime perfection!

We enjoyed this earlier in the week…and I love the “grill breath” that it leaves behind! Love, love, love dinner all on the grill!

Print This Post

Chicken and Potato “Stirfry” on the Grill

Yield – 4 adult servings
Prep Time – 15 minutes plus marinade time
Cook Time -20 minutes

Ingredients

2 chicken breasts, about 1 lb., cut into bite size pieces
2 Tbsp olive oil
2 tsp red wine vinegar
2 Tbsp garlic and onion grill seasoning
4 medium Idaho potatoes
1 green pepper, seeded and diced
1 onion, diced
Ketchup

Watermelon, or other fresh fruit, on the side


Directions

  • Cut the chicken into bite size pieces and place in a mixing bowl with the olive oil, red wine vinegar and seasoning.  Let marinate at least 30 minutes in the refrigerator.
  • Microwave the potatoes for a few minutes before slicing. (This will help them cook faster on the grill.)
  • Toss the potatoes, diced peppers and diced onions with the chicken pieces.
  • Place the mixture into the grill basket and cook for about 20 minutes, or until chicken pieces have cooked through. Toss and turn the chicken and vegetables often while they are grilling.  Use caution as grill basket handle is hot!
  • Serve with ketchup and a side of fresh fruit like watermelon or other fresh fruit.
Posted in Grill, Recipe | 19 Comments

Marinating & Batch Cooking Meats and Chicken – One Dish Dinners Tips and Tricks

As we roll into summer and we spend more and more time in front of the grill, there are 2 concepts that you need to start implementing…to help you spend less time in the kitchen or out by the grill.

Marinating. Batch Grilling.

You know I’m all about spending as little money as possible at the grocery store…but I’m also about streamlining my time spent in preparing the delicious foods that we eat every day.  Cooking from scratch most nights of the week can be time consuming, but there are a few strategies that you can implement to help you spend less time on a future meal.

When you marinate and batch grill…you can accomplish both the spend less time and spend less money. Double score!

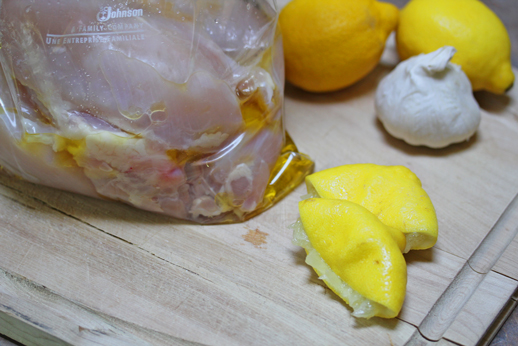
When I spy chicken breast on sale for $1.88/lb or $1.99/lb, I’m going to take advantage of this pricing and purchase several packages.  As soon as I get home from the store, I will open all the packages and place them into a plastic freezer baggies and add the marinade (recipe below). Squish the marinade around to get it to cover all the chicken and then let it sit in the fridge for up to 2 days.

From there, I will “batch grill” the chicken. (You can also batch grill burgers, fish, kebabs.) Simply cook all the 8 chicken breasts from the marinade…then cut some into slices, others into cubes and portion out into 2 cup portions.  The 8 chicken breasts will likely give you 4-5 meals worth, of 4 serving sizes. The batch grilled and sliced/cubed chicken pieces can then be frozen for future use.

Then when it comes time to make a quick pasta salad or casserole, you’ve already got some delicious, smoky grilled chicken prepared in the freezer!  Perfect topping for a salad made with lettuce from your garden, too!

Print This Post

Garlic Lemon Marinade for Chicken

Yield – Enough for 8 chicken breasts

Ingredients

8 chicken breasts
1/4 cup olive oil
Juice from 3 lemons
6 garlic cloves, crushed
1 Tbsp kosher salt
Pepper

Directions

  • Place the chicken breasts into a large plastic baggie.
  • In a small mixing bowl, whisk together the olive oil, lemon juice, crushed garlic, kosher salt and pepper.
  • Pour the marinade over the chicken.  Seal the bag and squish the marinade around so it covers all the chicken.
  • Refrigerate for at least 2 hours, ideally overnight.
  • Batch grill…then freeze the cooked chicken pieces.

Do you have a favorite homemade chicken, beef, pork or seafood marinade?! If so, we’d love to hear about it!

Posted in Grill, How To, Recipe, Tips and Tricks | 4 Comments

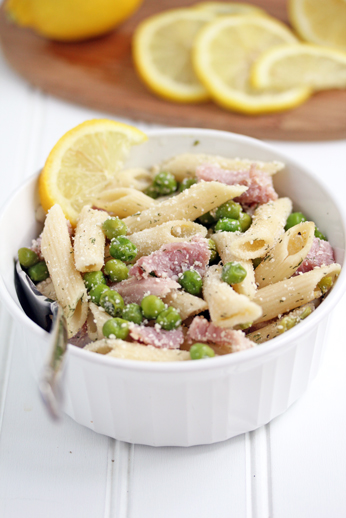
Lemon Pasta with Ham and Peas Recipe

When I think of pasta and peas together, I think of blue box macaroni with a can of tuna and a can or bag of frozen peas.  Well, that’s what I thought about pasta and peas before I really learned how to cook.

The fun of cooking  comes with exploring with flavors, textures and tossing together new ingredients. I’m always on the hunt for new favorite recipes…especially for lunch. And while this could definitely be dinner…it would make for a great pasta for lunch…and it would keep well in the fridge for leftovers.

I’m loving the ham, peas, lemon, Parmesan and dill flavors together in this one!!!

Print This Post

Lemon Pasta with Ham and Peas

Ingredients

3/4 lb penne pasta
2 cups cooked ham, diced
12 ounce bag frozen peas, cooked or steamed as directed
1/4 cup olive oil
Juice from 1 lemon plus about 1 tsp lemon zest
2 tsp white vinegar
1 tsp dried dill, or fresh if you have it
Salt and pepper to taste
1/4 cup Parmesan cheese


Directions

  • Cook the pasta as directed. Drain and don’t rinse. Return it to the pan it was cooked in, or into a serving bowl.
  • Toss the diced ham and the cooked peas with the pasta.
  • In a small mixing bowl, whisk together the olive oil, lemon juice, lemon zest, vinegar, dill along with some salt and pepper.  Pour it over the pasta and toss.
  • Toss in the Parmesan cheese.  Chill for at least 2 hours before serving. (If you are in a time crunch, rinse the pasta with cool water to cut the chilling time down to 15 to 20 minutes.)
  • Serve Lemon Pasta with Ham and Peas for lunch or dinner.
Posted in Dutch Oven, Recipe | 7 Comments